Power Apps has two sets of rules for showing/hiding buttons: Display rules and Enable rules. Display rules are running on the server side and enable rules are running on the client site (maybe counterintuitive). Custom rules (JavaScript rules) are therefore only available in client side (Enable rules).
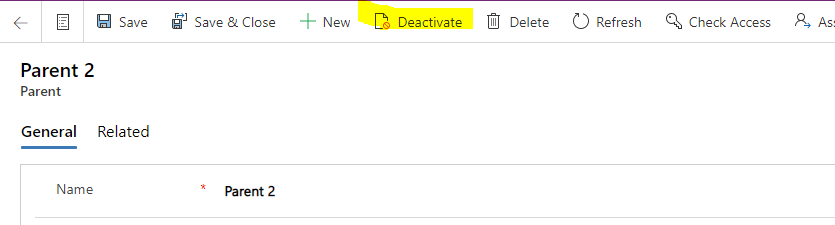
As an example, assumed we have two Tables (Parent and Child) with a one to many relation (Parent can have multiple children, child can only have one parent). We want to disable the “Deactivate” button on the Parent if it has children.
Preparations:
- In the make.powerapps.com, create 2 tables (Parent and Child) and set the relations between them
- Create a new Solution (example: RibbonEntitiesTest) and Add the two tables to it. This is needed for the Ribbon workbench to work.
- Create another Model driven application with the Parent and Child Tables for testing
Adding the JavaScript code with the logic:
- From make.powerapps.com, Select the table (Parent in our case) and Navigate to the

2) Navigate to the form where the ribbon is: (Main Information form for example)

3) Click the Form libraries tab on the left navigation
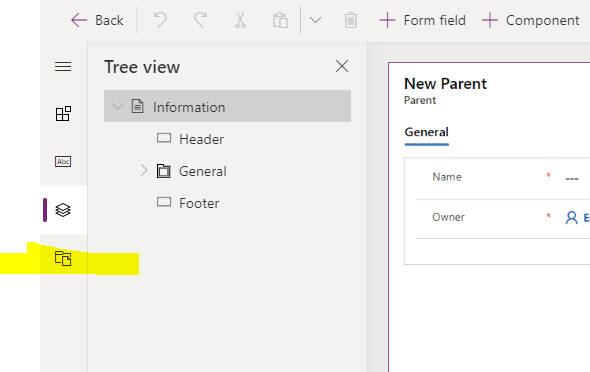
4) Click “Add Library” and then Click “New”

5) Set the library name, Type and Language

6) Either upload a new file or paste code directly in the Text Editor. Use the following code
var AB = AB || {};

AB.Ribbon = (function () {
    var isButtonEnabled = false;

    function IsButtonEnabled(formContext) {

        return new Promise(function (resolve, reject) {
            var Entity = "cr33f_child";
            var Select = "?$select=cr33f_name";
            var Filter = "&$filter=cr33f_Parent/new_parentid eq '" + formContext.data._entity._entityId.guid + "'";

            Xrm.WebApi.retrieveMultipleRecords(Entity, Select + Filter).then(
                function success(result) {
                    if (result.entities.length == 0) {
                        isButtonEnabled = true;
                    }

                    // return true or false
                    resolve(isButtonEnabled);
                },
                function (error) {
                    reject(error.message);
                    console.log(error.message);
                }
            );
        });
    }

    return {
        IsButtonEnabled: IsButtonEnabled
    };
})();
Note: you will have different prefixes (cr33f) and make sure of casing as the query is case sensitive
7) Click “Save” and “Publish”

Adding the new Rules to the ribbon:
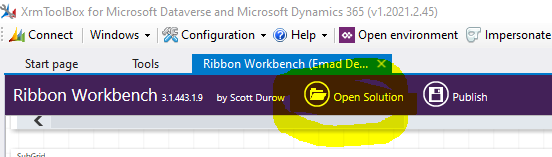
- Download and install XrmToolBox from Home · XrmToolBox
- From XrmToolBox, open the “Ribbon Workbench” tool

3) In the Ribbon workbench, click “Open Solution” and select the solution that has the tables, in this example: RibbonEntitiesTest.
4) Select the entity whose ribbon we need to customize, in our case, parent entity

5) Select the button we need to customize and click “Customize Command” (NOT customize button)

6) Click the Command and in the Enable rules click “Add Enable rule”

7) Click “Add Step” and select “Custom Rule”

8) Set the function name, library name (use autocomplete feature) and Add parameter (Primary control)

9) Click “Publish” (sometimes it takes up to 10 minutes to complete)

10) Test ! you can check a parent entity with no related children should have the “Deactivate” button shown while a parent with related children should not

Troubleshooting
One simple way to troubleshoot is to add &ribbondebug=true to the url. this will show a new button called “Command Checker”

if you click it , you can see more information like


Leave a comment